How to Master Rule of Thirds Photography in 2025

If you’re interested in taking photos, you’ve probably heard of the rule of thirds in photography. But what is the rule of thirds in photography? The rule of thirds in photography refers to the composition of an image.
Rule of thirds photography uses a grid to divide the image. While it’s called the rule of thirds in photography, it’s not a hard and fast rule. Rather, it’s more of a best practice. Mastering the rule of thirds, however, can provide a good base understanding of photography that can be helpful.
Photographs don’t have to follow the rule of thirds, but it’s still an important skill to master as the foundation of photography.
So, if you don’t need the rule of thirds in photography, why is it important? The rule of thirds is important because it helps to create a balance within the image, according to Adorama.
This balance helps to create a visually interesting photograph. After practicing the rule of thirds consciously, it often becomes an unconscious practice.
This allows you to lean into the basic photography rules or break them for a unique photography composition. This guide will help break down the rule of thirds for beginners and anyone looking to get into photography.
Jump to Section
- What is the Rule of Thirds in Photography?
- The Importance of Rule of Thirds in Photography
- How to Use the Rule of Thirds for Beginners
What is the Rule of Thirds in Photography?
First, let’s nail down the rule of thirds definition. With rule of thirds photography, the subject of the image is either on the left third or right third. This leaves the other two-thirds of the image open, typically showing only the backdrop.
Some rule of thirds examples would be a person standing on the right side of an image with mountains taking up the rest of the photo or a dog standing on the left side with a park taking up the other two-thirds.
This photography rule breaks the image into thirds by using two horizontal and two vertical lines. The four guidelines create a nine-square grid across an image. With rule of thirds photography, you want to place elements along the gridlines, leaving the rest of the space open.

The Importance of Rule of Thirds in Photography
Why is the rule of thirds important? Because it creates a well-composed shot every time. Rule of thirds photography can be very compelling, emphasizing both the subject and the backdrop of an image.
If you’re wondering how to become a photographer, particularly in the commercial photography industry, practicing the rule of thirds is a good place to start. Rule of thirds photography is a foundational skill that will become second nature over time.
By using the rule of thirds, you can perfectly balance the subject photo with the backdrop. The rule of thirds is also great for emphasizing movement in a photo.
You can have a subject moving in one third of an image and see where they’re going or leaving in the other two thirds. Both help to create a dynamic and visually interesting image.
This technique is particularly useful when capturing natural wonders like the Aurora Borealis in the northern U.S., where positioning the glowing night sky against a darkened landscape creates a breathtaking, balanced composition.

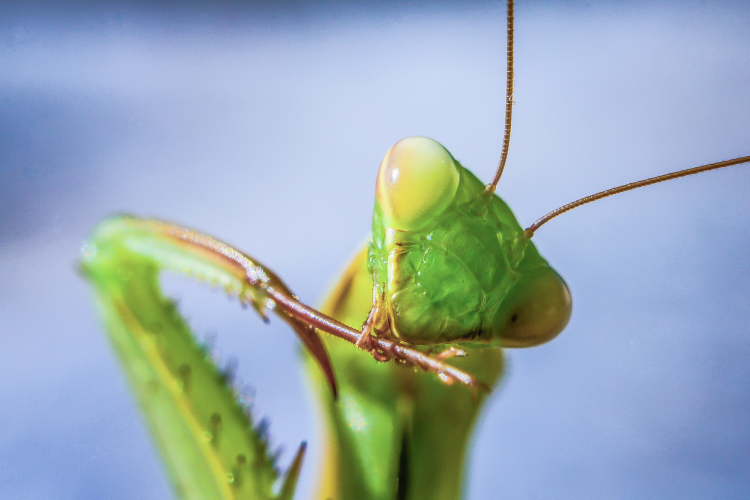
Nearly all types of photography from macro photography to flower photography can use the rule of thirds in their practice. Rule of thirds in photography examples for these types include a bee on a flower positioned on the right side of the frame or a focus on a flower field on the bottom third of the image.
You can also create a rule of thirds portrait by using these guidelines by placing the head at the crosshairs of the grid. This can create interesting images that help convey a story. For example, if you’re looking for birthday photo shoot ideas, consider a rule of thirds portrait with the party in the background.
Though the rule of thirds in photography is a foundational skill, it’s also important to remember it’s just one of many composition techniques. Rule of thirds photography produces consistently good photography results. However, it’s simply a guideline, and you can use it or “break the rule” to capture a compelling image.
How to Use the Rule of Thirds for Beginners
Where to Learn Rule of Thirds in Photography
So, now that you have an idea of what rule of thirds photography is, you may be wondering how to use it. One of the best ways to learn about rule of thirds photography is by taking photography classes in Austin, photography classes in Minneapolis, photography classes in Tampa, online photography classes or photography classes near you.
These classes are taught by expert photographers, who will teach the tips, tricks and techniques that have transformed their photographs. These classes are great for beginners who want to learn the basics and those with more experience who are looking to fine-tune their skills.
One of the first techniques you’ll learn with photography for beginners is how to use the rule of thirds in photography. If it’s such a beginner technique, you may be wondering which photographers use rule of thirds?
Virtually every single photographer, from amateur to professional, has used the rule of thirds in photography, which is why it’s so important to master.

Turn on Camera Guidelines
So, how do you use the rule of thirds in photography? First, you’ll want to turn the gridlines on your camera. Most digital cameras will have a feature where the grid can be toggled on or off.
The grids make it easy to see the image separated in thirds and can help master the rule of thirds for beginners, especially when practicing food photography. However, if your camera doesn’t have it or you have a little more practice, you can imagine the lines separating the image.
Focus on the Intersecting Points
Next, you want to focus on the four points where the horizontal and vertical lines intersect. One of these meeting points is where you want to place the subject of your image.
Rule of thirds in photography examples would be a human figure aligned on the right vertical line or a sunset placed along the bottom horizontal line. In general, you want to align vertical elements along the vertical guidelines and horizontal elements along the horizontal guides.
You can also use the rule of thirds in photography diagonally. Roads and rivers are the best rule of thirds examples for a diagonal composition. To achieve this, you’ll want to place the two ending points on opposite corners. For example, a winding road can start in the top right corner and end in the bottom right. This has the road moving across the image diagonally, often leaving the other corner boxes empty.
Rule of Thirds of Landscape Photography
With landscape photography, evaluate whether the upper or lower part of the scene is more interesting. The upper part of the scene is often the sky, mountains or cityscapes. Lower parts of the scene can be rivers, fields or the ground.
Once you decide which is more important to have in the image, place the horizon line accordingly. If you want the upper half of the image more in frame, the horizon line should be at the bottom guideline. To see more of the lower half of the scene, place the horizon line on the upper guideline.

Rule of Thirds for Portrait Photography
The rule of thirds can also be used for portrait photography. A rule of thirds portrait is no different than rule of thirds landscapes or other photography. Using the guidelines, you want to place the face or head of your subject on one of the intersecting points.
This creates a unique composition where the face would often be in sharp focus, but the background would have a blurrier appearance. It’s also a good rule of thumb to place the eyes on the upper rule of thirds line if you’re looking to fill the entire frame with a portrait.
Utilize Negative Space
Placement of negative space is directly related to the rule of thirds in photography. The negative space is the part of an image where the subject is not located.
With rule of thirds photography where the subject is looking somewhere or moving in a direction, you may want to consider placing the negative space in the open two-thirds of the image. With this composition, a viewer can see what the subject is looking at or moving towards.
Breaking the Rule of Thirds
As stated, the rule of thirds is not mandatory when it comes to photography. It’s simply a guideline. You can also “break” the rule of thirds in photography and still have an image with a stunning composition.
Breaking the rule of thirds can look like putting the subject of your image in the center of the photograph, leaving negative space on both the right and left sides. This can create a focal point that draws the eyes inward.
Another way to break the rule of thirds is by having a subject on both the left and right side of the image. Elements on the opposite sides of the picture can create balance and symmetry. Or perhaps you want to place an ocean sunset in the dead center of the image. This can create balance with the horizon in the middle, the sky above and the water below.
In short, the rule of thirds is only one method of composition. While it’s important for beginners to learn and master, it’s also a jumping-off point. Understanding the rule of thirds will allow you to create beautifully composed photographs.
The rule of thirds in photography is one of the basic skills all photographs know. Mastering the rule of thirds allows you to create beautiful compositions and intriguing photographs.
However, it’s also one of the most broken photography rules, which can also create something interesting. Rule of thirds photography creates balanced images that are satisfyingly even. Whether you use the rule of thirds for every photo or break from the mold will help create your unique artistic style.
For even more fun photography ideas, check out other experiences happening on Classpop!