How to Make a Bow for a Wreath in 2025

Making your own holiday wreath is one of the most beloved and popular DIY crafts, but when it comes down to how to make a bow for a wreath, it can get tricky. It’s not as simple as the bow you tie on your sneakers or adding a lovely ribbon to a present (though that can be challenging, too). When all the focus is on just one oversized bow, good technique is essential. Learning one of the many techniques for how to make a bow for a wreath will transform so many holiday crafts. There are multiple types of loops and bows you can make for your Christmas tree, wreath, presents or tablescape.
Making DIY Christmas decorations is a great way to get in the holiday spirit and put your creative talents to good use. And once you learn how to make the perfect bow for a wreath, you’ll want to display your artful ribbons everywhere, starting with your front door.
A lush and cheery holiday wreath is the best way to welcome your guests, according to the queen of hosting Ms. Martha Stewart. Not only that, but they have a rich history of special symbolism dating back to ancient times. Put a modern spin on your wreath or tree once you master how to make a bow for a wreath.
Jump to Section
How to Make a Layered Bow for a Wreath

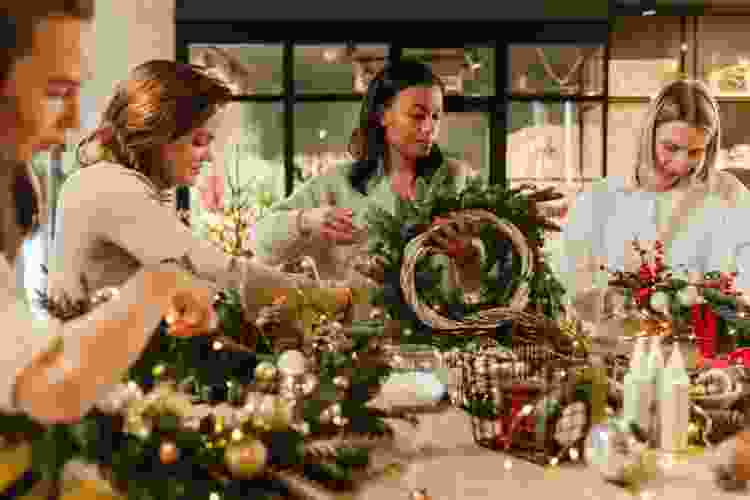
If you’ve always wanted to put your own handmade spin on holiday decor but aren’t sure where to begin, consider checking out some of the art classes near you. With art classes in Boston, art classes in New Jersey or art classes in Portland (to name a few) you can delve into the world of crafting with an expert as your guide.
Whether you want to make your own ceramic Christmas ornaments or expertly arrange foliage for a festive wreath, these classes will take you step-by-step from raw supplies to masterpieces. You can always opt for online art classes that let you learn from the comfort of your home. Maybe even turn it into a friend crafting party!
Making Your Bow
When it comes to how to make a bow for a wreath, layered bows are a popular choice. All that really means is stacking at least two bows on top of each other. This can create some fantastic dimension and gives you the opportunity to select at least a couple of festive ribbons like red velvet or black and white gingham if you’re making a Christmas wreath. You can figure out how to make a layered bow for a wreath for just about any season or occasion by choosing seasonally festive ribbons.
Some creators advise using two sizes of ribbons for one project, like two patterns in a 2.5” ribbon and two more in a 1.5” ribbon.
You will need:
-
Good scissors
-
A couple of pipe cleaners
-
A piece of tape or a special tool like the EZ Bow Maker
If you’re going to use tape, consider also having a ruler laid out so your bow will be even.
Process:
-
Begin creating your first series of loops by deciding how long you want your tails to be. Keep your ribbon the roll and pull out approximately 10”, then holding the ribbon with your fingers right at 10”, begin to form a loop that ends where you fingers are already holding the ribbon. This loop should be about 6.5”. Pinch the sides of the ribbon in so it’s cinched and hold it tightly.
-
Then, twist the ribbon around so the “front” or pretty side is facing towards you again and create another loop of approximately the same size. The two loops will be on opposite sides at this point in time, so their center is the same. Make sure to keep cinching and pinching the center together as you work. You don’t need to grab a ruler and be precise with the measurements, but you want your loops to be pretty much the same size when it comes to making a layered bow for a wreath.
-
Next, spin the ribbon around again so the front is facing you and create a third loop adjacent to your first loop. Pinch and cinch, then twist your ribbon one last time and pull out enough ribbon to match your 10” tail on the other side and trim.
-
This is where having the EZ Bow Master comes in handy because it has a special setup that pinches your bows together while you work on the other ribbons. Note this is a great gift for crafters and comes in handy for many projects. If you don’t have this, tape it down tightly and carefully. You should have two tails and three loops on this first ribbon.
-
If you are using the EZ Bow Master and layering your bows on top of each other, they should lay opposite the ribbon below them. So, lay the tail end over the side with two loops on your bottom design and when you stack on top of the second layer, it should lie the same way as the first.
-
Repeat these steps for how to make a layered bow for a wreath with your other ribbons, aiming for both of the larger 2.5” ribbons to have the same measurements, but go slightly smaller with your smaller ribbons. For this example, the tails can all be 10” but make the loops for the 1.5” ribbons closer to 5 or 5.5”. For the fourth and final ribbon, go even smaller still than the previous small ribbon.
-
To finish off your design, you’ll want to add an additional small loop for your fourth and final ribbon. In this case to make a layered bow for a wreath that covers any pipe cleaners or zip ties holding everything together, measure out your 10” tail, then leave yourself a small, 3” or so loop before making your other large loops. This final ribbon will lie down with one tail on either side.
-
Carefully remove your ribbon layers from the tool or tape, pinching them together tightly and use a pipe cleaner to tightly secure everything in the middle. Use your smallest loop to neatly cover the pipe cleaner or zip tie, then, while holding the center, work the tails down and out. Repeat with the loops, working your magic to evenly spread the loops and make it look perfect.
-
Once you’re left with a showstopping, multi-colored bow like this, it just makes sense to display it on your front door or as the centerpiece for your Christmas wreath ideas. You can fasten your bow to your wreath using wire, pipe cleaners or hot glue.
Super Easy Bow-Making

One of the most important aspects of making a bow for a wreath or another decorative purpose is choosing the right kind of ribbon. The color or pattern is completely up to your preference, but selecting a wired ribbon makes it much easier.
The wire gives some structure and makes it easier to perfect the shape of your bow. The width of the ribbon is another important consideration as you want it to be scaled. If you’re learning how to make an easy bow for your Christmas tree, you’ll need a fairly thick ribbon so it doesn’t look too small.
Once you get the hang of a layered bow, you’ll be able to figure out how to make a simple bow in no time. Rather than using multiple ribbons, you can continue making loops all on one roll. Following the above steps for how to make a bow for a wreath, leave yourself a tail and then start creating loops, pinching and twisting the ribbon after each one so the pretty side faces forward. If you choose to make a big but simple bow this way, you’ll want to end with an even number of loops, anywhere from six to ten.
Floral wire or pipe cleaners are the easiest to secure your bouncy bow and you can always add a small cut of ribbon over the top to hide it if for some reason it’s noticeable.
Making a whole bunch of these ribbons is a lovely Christmas craft because they look festive on your mantle, front door, attached to a wreath or on a present of course. Once you get the hang of it, it’s simple to make a bunch of them. A garland of ribbons would make for an elegant and charming DIY Christmas decoration hanging from a staircase or fireplace.
How to Make a Ribbon Bow for a Wreath

You can make a really lovely ribbon bow for a wreath with ease. Plus the added bonus of seeming like a décor genius!
To help with this, it’s helpful to create a small cardboard template. It will need three things: a line down the middle and a measurement on the length and width side. If you want to make a nice ribbon bow for a wreath, consider using 2.5” ribbon and have your measurements be 4” and 8”. Note this also means your cardboard rectangle should be 4x8”.
Process:
-
Begin by holding your ribbon edge against the center line on your template, then holding it there, wrap it around the rectangle three times. Once you have three layers, cut off the excess ribbon at the center line.
-
Next, slide out the cardboard template, aiming to keep your ribbon nice and flat and together. Then, pinch it in the center, from top to bottom. Use a small, thin wire or thread to secure this center cinch.
-
Pull the two tails out and guide them downwards. Then, use your fingers to gently arrange the top loops into two neat and fluffy loops. You can always cut a small slit of ribbon to cover your wire, along with a bit of hot glue to secure it.
This type of beautiful bow looks lovely on your mantle, tree or wreath. You can even use one massive and beautiful bow for a front porch Christmas decorating idea.
Who knew that knowing how to make a bow for a wreath was such a skill? Tying a regular old shoelace bow won’t cut it as your loops will look floppy and sad. With just a little more time and maybe a little help from some pipe cleaners, you’ll be crafting big beautiful show-stopping bows for any and every holiday project. Don’t forget to add the finishing details: a nice dovetail cut on the tails for added elegance.
For even more decoration ideas, check out other experiences happening on Classpop!


