How to Make a Book From Scratch for 2025

With digital words at the front and center of our world, knowing how to make a book from scratch feels like a lost art form. But it can be a rewarding hobby or craft depending on if you want to write your own novel or craft a colorful picture book for kids.
There’s perhaps no greater feeling than seeing your hours of creativity and hard work come to fruition in a physical form. Plus, putting your thoughts and ideas on paper makes them feel more permanent and keeps them around for future generations to enjoy.
If you’re looking for a unique craft to enjoy along with your kids, learning how to make a book together is perfect. Not only will their imaginations flourish but they’ll know the value of patience and tenacity to see a project through from start to finish.
For kids and adults, learning how to make a book can be a truly rewarding experience. If you’ve never thought about making a book, consider this your sign to explore a unique craft idea.
Jump to Section
How to Make a Book From Scratch

There are a few types of books you can make from scratch, ranging from simple papers folded and stapled together to a cloth-bound book or even a hardcover. This section will focus on a cloth-bound book that looks and feels protected but is still simple and affordable to make on your own. It’s ideal for making with your children, though teens and tweens can likely do this on their own.
How to Make a Book From Scratch - You Will Need:
To make a cloth-bound book, you’ll need a few simple supplies to craft the cover and protect your hard work on every page. Simple items like cloth tape, in your color or pattern of choice, along with a stapler, some paper and a pair of scissors will have you well on your way.
Method
1. Stack, Fold and Staple
Lay your stack of papers flat and even, folding it in half and pressing down firmly. The more sheets of paper you use the harder it might be to create a tight, even crease. Add staples down the crease, about ¼” in.
2. Cut and Lay Tape
Measure the length of the spine of your book, then cut that exact amount of cloth tape. Lay the tape down flat, sticky side up and center the spine of your book so it covers half of the tape. For a two-inch piece of tape, it should cover one inch.
3. Press Down to Seal

After securing your paper with cloth tape, press down firmly, maybe even using a heavy book, to create a strong seal. You can also use your fingers or a credit card to smooth out any air bubbles.
4. Fill Your Pages
Now that you know how to make a book, it’s up to you to fill the pages with meaningful stories, silly rhymes or colorful doodles. Booking online art classes will equip you to create some stunning graphics for your homemade book whether with acrylic paint, oil pastels or good old-fashioned colored pencils.
How to Make a Book for Kids

For kids, making a book ends up being a special way to remember that point in time. They can let their creativity shine through short stories or hand-drawn picture stories. Make it a parent-child craft where you help them put words to their artistic creations. Or, it can simply become a journal or rustic scrapbook.
How to Make a Book for Kids - You Will Need:
The absolute easiest way to make a book for kids involves a hole-puncher and some metal ring clips. Maybe the only thing easier would be folding and stapling papers together but at least this method allows for smooth and easy turning of the pages. You can opt to add a protective plastic sheet on the front and back too.
Method:
1. Stack Neatly and Press
You do want to make sure that your pages are lined up perfectly before you stamp your holes. Then, using a two or three-hole punch, press down firmly to create symmetrical and even holes.
2. Secure Pages Together

Using metal ring clips or ribbon, secure your pages together through the two or three holes created.
3. Add Designs
If you haven’t already, create a pleasing cover for your book. You can make a book for kids using this method before or after they have filled the pages as it’s super easy to add or replace pages. Help your kids write or draw stories for different life events, even holidays. These winter crafts for kids make great keepsakes and help pass the time when they don’t have school or sports.
How to Make a Hard Copy Book

Apart from sending your words off to a publisher, you can make a book from scratch that is fairly sturdy and well-preserved. While making a hard copy book is considerably more involved than the other previously listed methods, it’s by far the most professional-looking. Plus, it’s one of the more unique arts and crafts for adults.
How to Make a Hard Copy Book - You Will Need:
- Thin cardboard or bookbinder board for the covers. Repurposing a cereal box works great for this.
- Uncoated paper for the content, plus decorative paper for the covers
- Painter’s Tape
- Rubber cement or a hot glue gun and glue sticks
- Needle and thread or a stapler, ideally a long stapler
Method:
1. Fold or Tear Your Papers
The first step in all methods for how to make a book involves folding the papers. If you’re looking to create a decently thick book, don’t stack all your papers and fold them.
You’ll want to tear or cut the majority of your sheets down the middle. Then, take a full-sized sheet, fold it in half and slide a handful of smaller sheets in there. This is called a signature and a collection of signatures makes a book.
2. Bind Your Pages

The easiest way to bind your pages involves simply stapling them together along the seam, from the middle This would be done by unfolding your signature and opening your stapler to add several staples down the center.
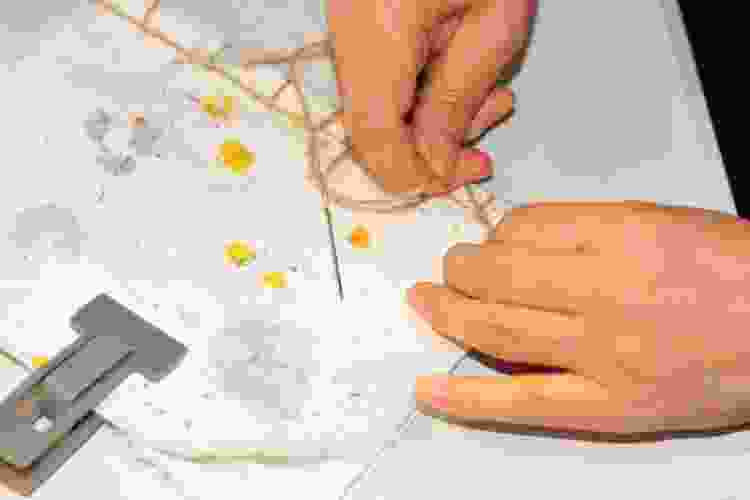
If you want to do this the “hard” way or the old-fashioned way, you’ll need a needle and thread. You’ll need a large amount of thread as you’re going to double it up. Thread your needle and pull it to the center of your string, then tie a small knot, creating a loop.
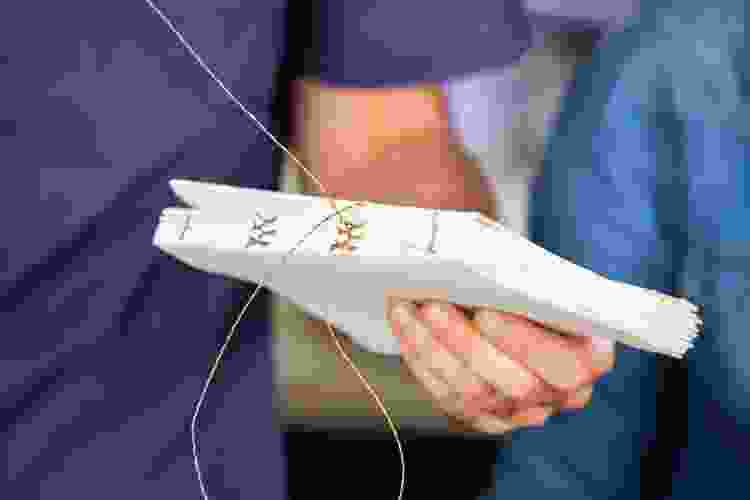
Start with your first signature and begin threading from the back to the inside, weaving one-inch intervals in a straight line. Do this until you reach the bottom of the first signature, then grab another signature and line it up with the first. Follow the same sewing pattern, criss-crossing across the backs to combine them.
Do this until all of your signatures are sewn together, then tie off with a small knot and cut the excess string.
3. Create Your Cover
Measure and cut your thin cardboard for the cover so it is approximately two centimeters wider and four centimeters taller than your book when it’s open. Cut your cardboard in half to create a front and back cover. Then, glue it to the first page (and last page), which should leave you with about one centimeter of overhang on the top and bottom.
4. Decorate Your Cover
Now that you’ve completed the hard work to make a book from scratch, it’s time to design your cover. Open your book completely so you can trace the size over craft or wrapping paper. Again you’ll want to cut a piece that is four centimeters wider and two centimeters taller than your book. Cut this large piece in half, one for the front cover and the other for the back cover. Fold your edges over like you’re wrapping a gift and secure with glue.
5. Make the Binding

To have your final product look legitimate, you’ll want a nice neat binding on the outside. This is an essential step for how to make a book that looks neat and tidy.
Using your painter’s tape, cut a piece that is the exact height and width of your book's binding. Tear another piece off that’s a few inches longer. Stick your smaller piece to the larger piece, leaving just a bit of stickiness around the edges. It shouldn’t stick directly to your binding but rather just the front and back covers. You may need to trim off some excess length at this time.
6. Final Touches
By this point, you’ve successfully made a book from scratch! Since the painter’s tape is likely a different color than your decorative paper, you can take the liberty of painting over it or writing on it to add finishing touches. Don’t forget to write your name on the cover. This could be the perfect book for keeping track of recipes or as a rustic Polaroid scrapbook.
Learning how to make your own book opens up a world of possibilities in terms of gifting or cherishing art, poems and family stories. It’s a really special gift for crafters who can appreciate the time and effort involved in something homemade.
For even more fun crafting ideas, check out other experiences happening on Classpop!

