DIY Christmas Village Ideas for Festive Homemade Decorations
Making your own DIY Christmas village is the best way to get the holiday season started. Whether you want to personalize store-bought items or build the perfect winter wonderland scene, creating your own Christmas village lets you give each detail a more unique and meaningful touch.
In this article, we'll explore easy DIY Christmas village ideas that are both creative and affordable. Prepare to turn your home into a festive wonderland with a few basic supplies and a hint of holiday magic!
Jump to Section
- What Do You Need to DIY a Christmas Village?
- How to Build and Decorate Your Christmas Village
- Fun DIY Christmas Village Themes
- How to Pack up a Christmas Village
What Do You Need to DIY a Christmas Village?
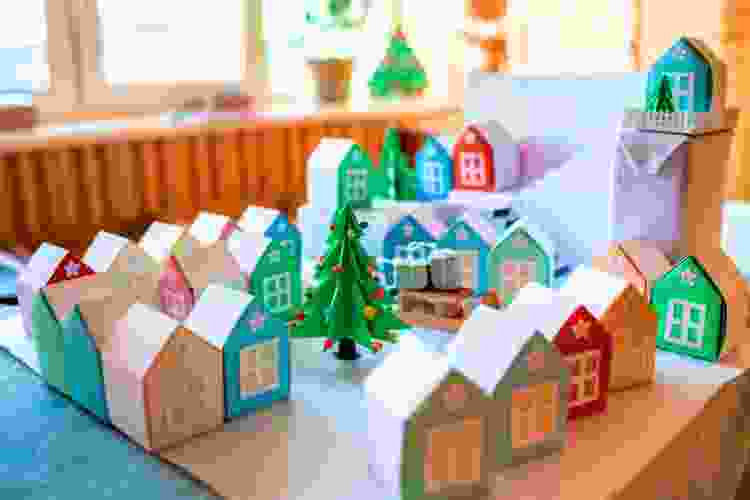
First things first: do people still put up Christmas villages? Absolutely! With a fresh contemporary look and additional personalization options, these lovely displays are still a well-liked custom. Whether you want to create a nostalgic vintage style or something more modern, DIY Christmas villages continue to be a favorite Christmas craft for families. Plus, you may also use your village as one of your Christmas centerpiece ideas.
A few necessary supplies can help you realize your festive idea when you make a DIY Christmas village. If you don’t have that much time, you can consider buying Christmas village kits to build, which often include miniature houses, figures and trees.
If you prefer a more hands-on approach, these are some of the basic materials you need to create your DIY Christmas village:
- Base or Platform: A sturdy foundation to build your village on. This might be a tray, foam or a wooden board.
- Miniature Structures: The main components of any Christmas village are the homes and businesses. You may either purchase them or make your own out of cardboard or wood. Another popular option is to buy unfinished wood houses and customize them.
- Trees and Greenery: Pine trees, wreaths and garlands help give your village a more rustic feel. Craft stores sell these, or you can make your own with wire and green flocking.
- Figures: Tiny people, animals and cars bring your village to life. You can paint your own or ready-name ones to suit your theme. In some cases, to bring a religious touch to your village, you can also add the three wise men and baby Jesus.
- Lighting: To create a magical DIY miniature village, add a special glow with string lights or battery-powered LED lights inside the buildings or around the village.
- Snow and Scenery: Fake snow, cotton batting or glitter can be used to create a wintery and snowy landscape. For more details, you can even add clay or cardboard hills, fences and rivers.
How to Build and Decorate Your Christmas Village
If you’re excited about building your own Christmas village but don’t know where to start, the key lies in planning. At first, it might be overwhelming, with so many options and sizes. But once you start planning how you want your village to look like and the size, it becomes a fun and unique experience. Let’s go over the basic steps to building a DIY Christmas village!
1. Start with the Theme
There are different fun and engaging themes for your Christmas village (we’ll get to this below). You might want to go for a modern scene or the classic winter wonderland town that makes you in love with Christmas.
Once you sketch a rough layout and the theme, it’s easier to see the materials you’ll need to implement your plan. Think of where you want the buildings to be, how many trees you want and where the figurines will go.
A useful tip is to create depth by placing taller items like houses or trees at the back and smaller accessories like figurines or benches at the front. You can also use foam rises or household items (like wrapped books with festive fabric) to help you create height.
2. Customize Your Village Houses
One of the most fun parts of creating a DIY village is adding your own personal touch to the houses. You can use store-bought Christmas village kits to build and personalize them with a fresh coat of paint or glitter in tune with your color scheme.
If you want a more manual approach, crafting DIY Christmas village houses from scratch allows you to fully tailor each building and item. For this, you can use materials like cardboard or foam board.
Additionally, don’t feel the need to create traditional house shapes. You can get creative by adding unique touches, like transforming a birdhouse into a mini bakery.
3. Focus on The Details
The small details make your DIY Christmas village unique. Start by adding trees, snow and natural elements that enhance the wintery and Christmassy feeling. The best option is to buy pre-made bottlebrush trees, but you can also craft your own using wire, flocking and glue. To create a snowy landscape, sprinkle artificial snow on the surface and on rooftops for a frosty effect.
If you’re doing an outdoor village, it’s key to use more robust materials, like durable resin trees, in case of bad weather.
To make your outdoor display stand out, create snowbanks by shaping foam or spray insulation into mounds, then cover them with snow blankets or glitter for a shimmering effect. If your display is indoors, use salt, baking soda or a light dusting of flour to create a more natural snow appearance that won’t blow away.
Step 4: Add Personalized Figurines and Accessories
Now that you have the most relevant elements, such as the houses and structure, it’s time to bring to life your DIY miniature village. For this, choose figurines and accessories that match your theme. It could be carolers, ice skaters, little kids, etc.
A great way to add that extra something is by adding small accessories like street lamps, benches or even a tiny mailbox can make a big difference in creating a realistic setting. You can make these accessories with popsicle sticks or toothpicks.
Step 5: Add Lights
One key element in any Christmas village is the lighting. For indoor displays, you can place small battery-powered LED lights inside the houses to create a warm glow. For outdoor setups, solar-powered lights are perfect for keeping your display energy-efficient and environmentally friendly.
Don’t limit lighting to just the houses—wrap tiny string lights around trees, or add lanterns along the village streets. You can also use colored lights to create a cozy nighttime scene for your village.
Step 6: Display Your Village with Style
What is the best way to display a Christmas village? The answer depends on your space and how much attention you want your village to get. For indoor displays, consider creating a multi-level setup to add dimension. This could involve using cake stands, boxes, or even stacking books to give your display height and variety.
For an outdoor Christmas village, weatherproof platforms or planters work well to elevate the houses and keep them safe from moisture.
Fun DIY Christmas Village Themes
Creating a Christmas village is not only about setting up houses and trees—it's also a chance to get creative with fun and unique themes! Whether you want to stick with a classic look or try something more creative, these DIY Christmas village ideas will inspire you to create a festive and personalized display this holiday season.
1. Classic Winter Wonderland
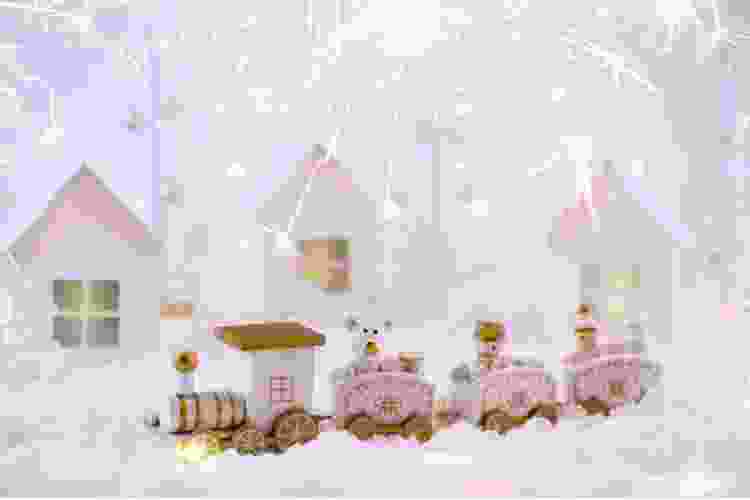
For a timeless holiday display, the Classic Winter Wonderland theme is perfect. This theme features snow-covered DIY Christmas village houses, twinkling lights and cozy details like carolers and ice skaters. The focus is on capturing the traditional charm of a Christmas village with neutral colors, frosted trees and peaceful scenes.
To achieve this theme, start with Christmas Village kits that feature classic designs, such as small cottages, churches and town squares. Add plenty of faux snow, trees and tiny people enjoying traditional Christmas activities like sledding or shopping at a holiday market.
2. Victorian-Era Village
Transport your Christmas village back in time with a Victorian-Era Village theme. This idea is perfect if you enjoy detailed work and Christmas crafts. You can focus on grand buildings, horse-drawn carriages and elegant figurines in vintage clothing. The color palette is rich and muted, featuring deep reds, greens and golds.
For this theme, use DIY materials to craft elaborate DIY Christmas village houses with tall windows, decorative trims and ornate doors. You can also incorporate Christmas painting ideas to create unique backdrops, such as hand-painted skies or cobblestone streets.
3. Candy Village
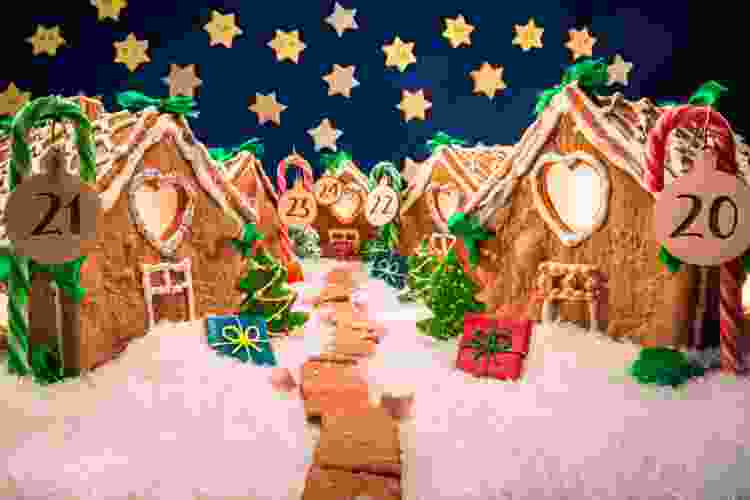
For a more playful take, a Candy Village is a bright and fun option, perfect for homes with kids or those who love bold, imaginative decorations. Think of gingerbread houses, candy cane lampposts and snow made out of cotton candy! Because this is so imaginative, it makes for wonderful Christmas crafts for kids.
Create easy DIY Christmas village houses out of gingerbread, cardboard, or painted wood. Decorate the houses with faux candy decorations like oversized gumdrops, candy canes and lollipops. This is a great opportunity to get creative with bright colors and fun accessories.
Indoor table displays or as part of an interactive Christmas centerpiece idea where guests can admire the colorful details.
4. Miniature Ski Resort
If you love the outdoors and winter sports, a Miniature Ski Resort theme is a fun way to bring that energy into your Christmas village. Picture a small mountain town with ski lodges, cable cars and skiers making their way down snowy slopes.
Build ski chalets and log cabins as part of your DIY Christmas village houses using simple materials like wood or foam board. Create slopes using styrofoam and cover them with fake snow. Use figurines of skiers, snowboarders and sledders to bring the scene to life.
How To Pack up a Christmas Village

How do you pack up a Christmas village? After the holiday season, it’s essential to pack up your Christmas village carefully to ensure it lasts for years to come.
Begin by removing the figurines and smaller accessories, followed by disassembling houses and lights. Wrap each item individually in tissue paper or bubble wrap and use sturdy boxes to store fragile pieces like DIY Christmas village houses. For easy organization, label each box and consider using plastic bags to keep smaller items like figurines together.
Creating a DIY Christmas village is a fun way to add a festive touch to your holiday décor. From choosing a fun theme to building and decorating your village, the possibilities are endless.
Whether you’re crafting an indoor display or a DIY outdoor Christmas village, there are plenty of creative options to make your village unique. With a bit of imagination, you can transform your space into a magical winter wonderland.
For even more fun Christmas decoration ideas, check out other experiences happening on Classpop!

